
If you have ever wanted to print vibrant, full-color designs on a wide range of fabrics without the hassle of traditional screen printing, DTF Transfers might be exactly what you need. DTF stands for Direct to Film, a printing method that has taken the custom apparel world by storm. Unlike other techniques, DTF transfers allow you to print intricate details and gradients on virtually any fabric, from cotton to polyester and even blends. In this guide, we will walk you through everything you need to know about DTF transfers, from the basics to pro tips, so you can start creating stunning custom pieces today.
What Are DTF Transfers?
DTF Transfers are a type of heat transfer that involves printing a design onto a special film, coating it with a powdered adhesive, and then using a heat press to apply it to a garment. The process starts with a digital printer that uses CMYK and white inks to create the design on a PET film. After printing, a hot melt powder is applied to the wet ink, and the film is cured. The result is a transfer that can be stored and later applied to fabrics with a heat press. This method is incredibly versatile because it doesn't require pre-treatment of the fabric, and it works on both light and dark materials.
The DTF Printing Process Step by Step
Understanding the DTF process helps you appreciate the technology and troubleshoot issues. Here's a breakdown:
- Design Preparation: Your artwork is prepared in a RIP software, which mirrors the image and adds a white ink layer underneath the colors.
- Printing: The design is printed onto a PET film using a DTF printer with pigment inks.
- Powdering: While the ink is still wet, a thermoplastic powder is sprinkled over the print. The excess powder is shaken off.
- Curing: The film passes through a curing oven or under a heat source to melt the powder, creating a durable adhesive layer.
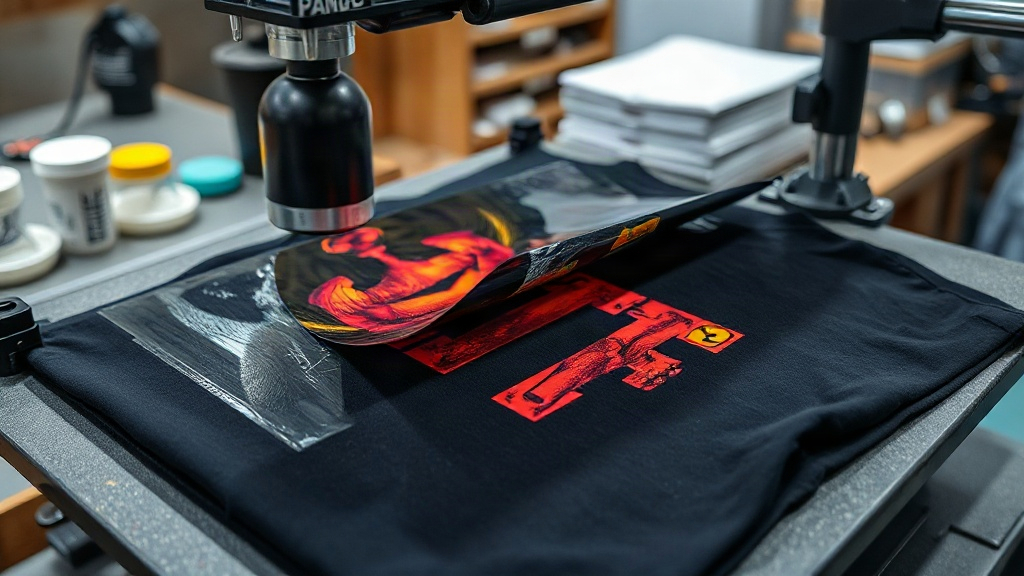
- Transfer: The cured film is placed on the fabric and pressed with a heat press at around 160°C (320°F) for 10-15 seconds.
- Peeling: After pressing, the film is peeled off (hot or cold peel depending on the film), leaving the design bonded to the fabric.
Why Choose DTF Transfers Over Other Methods?
There are several reasons why DTF transfers have become a favorite among crafters and commercial printers alike. Let's compare them to other popular techniques.
DTF vs. Screen Printing
Screen printing requires a separate screen for each color, making it cost-effective only for large orders with simple designs. DTF, on the other hand, has no color limitations and no setup costs, making it ideal for small batches and complex artwork. Plus, DTF doesn't require color separation, so you can print photorealistic images with ease.
DTF vs. DTG
Direct to Garment (DTG) printing is another digital method, but it requires pre-treatment and works best on 100% cotton. DTF adheres to a wider range of fabrics, including polyester and blends, and often produces more vibrant colors on dark shirts because of the white ink base.
DTF vs. Vinyl
Heat transfer vinyl (HTV) is great for simple one-color designs, but layering multiple colors can be time-consuming and bulky. DTF transfers allow you to print full-color designs in one go, with a soft hand feel and excellent stretchability.
Benefits of DTF Transfers
- Versatility: Works on cotton, polyester, blends, and even treated nylon.
- No Weeding: Unlike vinyl, there's no tedious weeding process.
- Durability: When applied correctly, DTF prints withstand repeated washing without cracking or fading.
- Vibrant Colors: The white ink base makes colors pop on dark fabrics.
- Cost-Effective for Small Runs: No minimum order quantity and low setup costs.
- Detailed Artwork: Perfect for photographs, gradients, and fine lines.
How to Apply DTF Transfers Correctly
To get the best results from your DTF transfers, follow these application guidelines. Always test on a scrap piece of fabric first to dial in your heat press settings.
Step 1: Preheat Your Heat Press
Set your heat press to 160°C (320°F) for cotton and 150°C (300°F) for polyester. Preheating the fabric for a few seconds removes moisture and wrinkles, ensuring proper adhesion.
Step 2: Position the Transfer
Place the DTF transfer on the garment with the printed side facing up. If your design has a white layer, it's already on the film; the adhesive side is against the fabric.
Step 3: Press with Medium Pressure
Apply medium pressure for 10-15 seconds. Too little pressure can cause poor adhesion, while too much can flatten the print.
Step 4: Peel the Film
Most DTF transfers are cold peel, meaning you wait a few seconds until the film is cool to the touch before peeling. Some films are hot peel; check the instructions provided with your transfers.
Step 5: Post-Press for Durability
For added durability, especially on stretchy fabrics, cover the design with a Teflon sheet or parchment paper and press again for 5-10 seconds. This ensures the adhesive fully penetrates the fabric fibers.
Common Mistakes to Avoid with DTF Transfers
Even seasoned crafters can run into issues. Here are some pitfalls to watch out for:
- Insufficient Pressure: Leads to peeling or washing off. Use consistent, firm pressure.
- Wrong Temperature: Too hot can scorch the fabric or melt the film; too cool can prevent proper adhesion.
- Not Pre-Pressing: Moisture in the fabric can cause steam and poor bonding.
- Peeling Too Early or Too Late: Follow the film's instructions for hot or cold peel to avoid distortion.
- Stretching the Design: When applying to stretchy fabrics, pre-stretch the garment slightly before pressing to avoid cracking.
Design Tips for Stunning DTF Transfers
To make your DTF transfers stand out, consider these design best practices:
- Use High-Resolution Images: At least 300 DPI to avoid pixelation.
- Add a White Underbase: Essential for printing on dark or colored fabrics.
- Keep Fine Details Manageable: Very thin lines may not reproduce well; aim for at least 1pt thickness.
- Consider Fabric Color: Transparent inks can blend with the background; use white base for opacity.
- Test Print: Always do a test print on similar fabric to check colors and adhesion.
Frequently Asked Questions About DTF Transfers
How long do DTF transfers last?
With proper application and care, DTF transfers can last as long as the garment itself. They withstand dozens of washes without fading or cracking if you follow the correct heat press settings and wash inside out in cold water.
Can I use DTF transfers on polyester?
Yes, DTF transfers work well on polyester and polyester blends. However, you should lower the temperature to around 150°C (300°F) to prevent the polyester from scorching or the transfer from over-melting.
Do I need a special printer for DTF transfers?
Yes, DTF printing requires a dedicated DTF printer that uses pigment inks and can print white ink. You also need a powder shaker and a curing oven. Alternatively, you can buy pre-printed DTF transfers from suppliers.
What is the difference between hot peel and cold peel DTF transfers?
Hot peel transfers are peeled immediately after pressing while the film is still hot. Cold peel transfers require you to wait until the film cools down before peeling. The type depends on the film manufacturer; always follow the instructions.
Can I layer DTF transfers?
Yes, you can layer DTF transfers, but it's best to press each layer separately. Apply the first transfer, peel the film, then apply the second on top. Use a Teflon sheet to protect the design during subsequent presses.
DTF transfers have revolutionized the custom apparel industry by offering unmatched versatility, vibrant colors, and ease of use. Whether you're a hobbyist or a professional printer, incorporating DTF transfers into your workflow can open up a world of creative possibilities. With the right techniques and a bit of practice, you'll be producing stunning, durable prints that impress your customers and keep them coming back for more.