
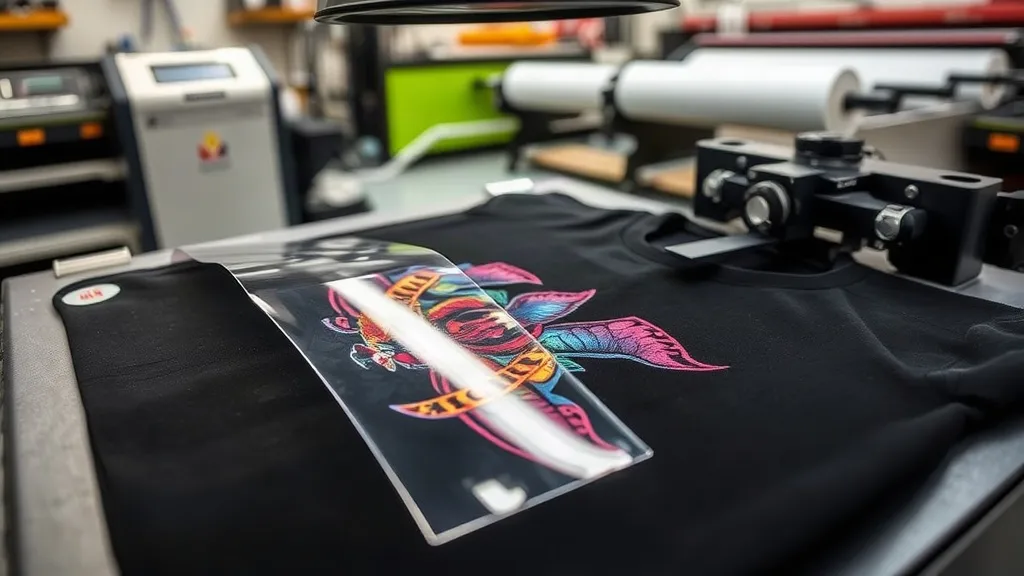
When you first hear about dtf printing, it might sound like just another printing acronym. But once you see a vibrant, full-color design transferred onto a dark cotton t-shirt with incredible softness and stretch, you realize this technology is a game-changer. I remember my first DTF print: a detailed watercolor illustration that I thought would be impossible to reproduce on fabric. The result was stunning, with crisp lines and smooth gradients. In this guide, I'll walk you through everything you need to know about DTF transfers, from the basics to advanced tips, so you can achieve professional results at home or in your shop.
What Exactly Are DTF Transfers?
DTF stands for Direct to Film. It's a printing method where your design is printed onto a special film, coated with a powder adhesive, and then heat-pressed onto fabric. Unlike DTG (Direct to Garment) or screen printing, DTF doesn't require pre-treatment or special inks for different fabric colors. The process works on cotton, polyester, blends, and even nylon. The magic lies in the film and the powder: the film holds the ink, and the powder melts to bond the design to the fabric.
The DTF Printing Process Step by Step
Here's a breakdown of how a DTF transfer is made:
- Design Preparation: Your artwork is prepared in a graphics program, ensuring it's mirrored (unless your printer software does it automatically).
- Printing: A DTF printer uses special pigment inks to print the design onto a PET film. White ink is usually printed as a base layer to make colors pop on dark fabrics.
- Powdering: While the ink is still wet, a hot-melt adhesive powder is applied evenly over the print. Excess powder is shaken off.
- Curing: The film goes through a curing oven or heat press to melt the powder, creating a dry, flexible adhesive layer.
- Transfer: The film is placed on the fabric and heat-pressed. After cooling, the film is peeled away, leaving the design bonded to the fabric.
Why Choose DTF Transfers Over Other Methods?
If you're familiar with vinyl cutting or screen printing, you know the limitations: multiple colors, complex gradients, and fabric restrictions. DTF transfers solve many of these issues. For starters, you can print photographic images with millions of colors in one go. There's no need to layer vinyl or create separate screens. Plus, DTF works on a wide range of fabrics, including those that are hard to print on like canvas and leather. The prints are also durable; with proper washing, they can last as long as the garment itself.
Cost-Effectiveness for Small Businesses
For small business owners, DTF transfers offer a low startup cost compared to screen printing. You don't need a separate screen for each color, and you can print one-off designs without minimum orders. This makes it ideal for personalized gifts, custom apparel, and sample production. However, the cost per print can be higher for large runs, so it's essential to weigh your options based on volume.
Materials You'll Need for DTF Printing
To get started with DTF, you'll need a few key supplies:
- DTF Printer: A dedicated printer with DTF inks (CMYK + White).
- PET Film: Special film designed for DTF, usually available in rolls or sheets.
- Hot-Melt Powder: The adhesive that bonds the ink to the fabric. It comes in different particle sizes; finer powder is better for detailed designs.
- Heat Press: A reliable heat press with accurate temperature and pressure control.
- Curing Oven: Optional but recommended for professional results; you can also use a heat press for curing.
Choosing the Right Film and Powder
Not all films are created equal. Some films are designed for cold peel, others for hot peel. Cold peel films allow the transfer to cool before peeling, which can result in a smoother finish. Hot peel films are removed immediately after pressing, saving time. The powder also matters: fine powder (80-100 microns) is great for intricate details, while coarser powder (150-200 microns) works well for bold, solid areas. Experiment to find what suits your designs.
Step-by-Step Guide to Applying DTF Transfers
Applying a DTF transfer is straightforward, but attention to detail ensures a professional finish. Here's how I do it:
- Preheat the Fabric: This removes moisture and wrinkles. Set your heat press to around 160°C (320°F) for 10-15 seconds.
- Position the Transfer: Place the film with the design facing up on the fabric. If your design is mirrored, ensure it's oriented correctly.
- Press: Apply medium to high pressure for 15-20 seconds. The exact time depends on your press and film type.
- Peel: For cold peel, wait until the film is cool to the touch (about 30 seconds) before peeling. For hot peel, remove immediately.
- Post-Press (Optional): Some people do a second press with a Teflon sheet for 5 seconds to enhance durability.
Common Mistakes and How to Avoid Them
Even experienced printers run into issues. Here are a few pitfalls and their solutions:
- Insufficient Pressure: If the transfer peels off or looks dull, increase pressure. The powder needs to penetrate the fabric fibers.
- Wrong Temperature: Too hot and the film may shrink or the ink may burn; too cold and the adhesive won't activate. Always test with a scrap piece.
- Peeling Too Early or Too Late: Follow the film's instructions. Cold peel films must be completely cool; hot peel films should be removed while hot.
- Poor Powder Application: Uneven powder leads to patchy transfers. Shake off excess gently and ensure full coverage.
DTF Transfers vs. Other Printing Methods
How does DTF stack up against DTG, screen printing, and vinyl? Let's compare:
- DTG: Best for 100% cotton, but requires pre-treatment and can be less vibrant on dark colors. DTF works on more fabrics and has brighter colors.
- Screen Printing: Cost-effective for large orders but expensive for small runs and limited in color complexity. DTF excels in small batches and full-color designs.
- Vinyl: Great for simple text and shapes, but not for complex images. DTF handles gradients and photos with ease.
When to Choose DTF Transfers
DTF is ideal for: small businesses offering custom apparel, personalizing gifts, creating samples, and printing on tricky fabrics like polyester or blends. It's also a fantastic option for adding designs to items like tote bags, hats, and even shoes.
Frequently Asked Questions About DTF Transfers
How durable are DTF transfers?
When applied correctly, DTF transfers are very durable. They can withstand 50+ washes if you turn the garment inside out and use cold water. Avoid ironing directly on the print.
Can I use DTF transfers on any fabric?
DTF works on most fabrics, including cotton, polyester, blends, nylon, and leather. However, fabrics with a heavy texture (like terry cloth) may not yield perfect results.
Do I need a special printer for DTF?
Yes, you need a DTF printer that uses DTF inks and has a white ink channel. Converting a regular printer is possible but often not worth the hassle.
How do I store DTF transfers?
Store them in a cool, dry place, away from direct sunlight. Keep them flat or rolled, not folded, to prevent cracking.
What's the difference between hot peel and cold peel DTF transfers?
Hot peel transfers are removed immediately after pressing, while cold peel transfers must cool completely before peeling. Cold peel often gives a smoother finish, but hot peel is faster.
Mastering DTF transfers opens up a world of possibilities for custom apparel. With practice, you'll be able to produce vibrant, long-lasting prints on almost any fabric. Remember to test your settings and enjoy the process. Happy printing!